Understanding the Transfer Case
What is a Transfer Case?
A transfer case is an intermediate gearbox․ It transfers power from the transmission to the axles․ It is used in four-wheel-drive vehicles‚ allowing the driver to engage or disengage 4WD mode․
In 2WD mode‚ the transfer case directs power only to the rear axle․ Gears disconnect the front axle from the powertrain․ This provides efficient operation on paved roads‚ reducing wear․
What is a Transfer Case?
A transfer case is an essential component in four-wheel-drive (4WD) and all-wheel-drive (AWD) vehicles․ It acts as an intermediate gearbox‚ receiving power from the transmission and distributing it to both the front and rear axles․ The transfer case enables the vehicle to switch between two-wheel-drive (2WD) and four-wheel-drive modes‚ providing versatility for various driving conditions․
In 2WD mode‚ power is typically sent only to the rear axle‚ optimizing fuel efficiency and handling on paved roads․ When 4WD is engaged‚ the transfer case mechanically links both axles‚ providing increased traction on slippery or uneven surfaces․ Some transfer cases also include a low-range gear‚ further multiplying torque for challenging off-road situations․ The transfer case is a critical element in a 4WD vehicle’s drivetrain․
Function of the Transfer Case in 2WD Mode
In 2WD mode‚ the transfer case’s primary function is to efficiently transmit power from the transmission solely to the rear axle․ This is achieved by disengaging the connection to the front axle‚ allowing it to “freewheel․” This disconnection minimizes drivetrain friction and reduces wear and tear on front-end components‚ resulting in improved fuel economy and a quieter ride during normal on-road driving conditions․
Effectively‚ the transfer case acts as a selector‚ directing power either to the rear wheels only (2WD) or to both front and rear wheels (4WD)․ When in 2WD‚ the transfer case ensures that the front driveshaft and differential are not actively driven by the engine‚ thus reducing parasitic losses․ This is the standard operating mode for most daily driving scenarios․
Identifying Your Transfer Case Type
The transfer case type dictates how 2WD mode is engaged․ Types include manual shift and electronic shift․ Consult your owner’s manual to identify your transfer case type and its specific operation;
Manual Shift Transfer Case
Manual shift transfer cases employ a lever to engage or disengage 4WD․ Shifting requires physically moving the lever‚ directly controlling the transfer case’s internal mechanisms․ This system offers simplicity and direct control․ To shift into 2WD‚ locate the lever‚ usually near the gear shifter․ Ensure the vehicle is stationary‚ or moving slowly‚ depending on the vehicle’s specifications․
Move the lever to the designated 2WD position․ You may need to apply slight pressure or rock the vehicle to align the gears․ A distinct “click” or engagement sound usually indicates successful shifting․ Refer to your vehicle’s manual for specific instructions and recommended speeds for shifting․
Manual transfer cases are often found in older vehicles or those designed for rugged off-road use‚ prioritizing driver control over automated convenience․ Regular maintenance‚ including checking linkage and fluid levels‚ is crucial for optimal performance․
Electronic Shift Transfer Case
Electronic shift transfer cases use electrical switches or buttons to engage or disengage 4WD․ A shift motor‚ controlled by the vehicle’s computer‚ handles the actual shifting within the transfer case․ If the electronic system fails‚ manually shifting into 2WD often involves bypassing the electric motor․
First‚ locate and remove the shift motor from the transfer case․ This usually involves disconnecting electrical connectors and unbolting the motor․ With the motor removed‚ a spline shaft will be exposed․ Using a wrench‚ carefully turn the spline shaft to the 2WD position․ Refer to your vehicle’s repair manual for the exact position․
Turning it clockwise is 2WD․ Once in 2WD‚ you can reinstall the shift motor․ However‚ the underlying electrical issue needs addressing for normal operation․ This manual method is a temporary solution․
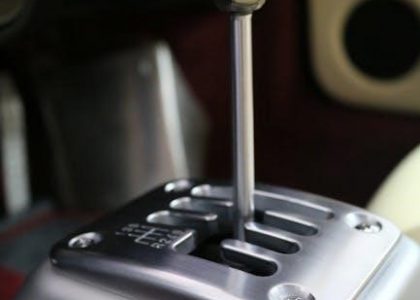
The shift lever is typically located near the gear shifter․ It allows direct control over the transfer case․ This lever is used to select 2WD‚ 4WD High‚ or 4WD Low․
Locating the Transfer Case Shift Lever
Finding the transfer case shift lever is the first step in manually shifting your vehicle into 2WD․ The location of this lever can vary depending on the make‚ model‚ and year of your vehicle․ Typically‚ you’ll find it near the gear shifter‚ either on the floor between the seats or on the dashboard․ It is often smaller than the main gear shift lever and may have markings indicating the different drive modes‚ such as 2H‚ 4H‚ and 4L․
Consult your vehicle’s owner’s manual for the precise location of the transfer case shift lever․ The manual will also provide a diagram or illustration to aid in identification․ In some cases‚ the lever may be hidden or partially obscured by the center console‚ so carefully examine the area around the gear shifter․ Once you’ve located the lever‚ take a moment to familiarize yourself with its range of motion and the corresponding drive modes․
Manually Shifting a Manual Transfer Case to 2WD
Shifting Procedure for Manual Transfer Cases
Once you’ve located the transfer case shift lever‚ you can proceed with shifting into 2WD․ Before initiating the shift‚ ensure your vehicle is stationary and‚ ideally‚ on a level surface․ Engage the parking brake for added safety․ If your vehicle has a manual transmission‚ depress the clutch pedal fully․ For automatic transmissions‚ place the gear selector in neutral (N)․
With the vehicle properly prepared‚ firmly grasp the transfer case shift lever․ Refer to your owner’s manual for the correct shift pattern․ Typically‚ shifting from 4WD to 2WD involves moving the lever from the 4H or 4L position to the 2H position․ Use a smooth‚ deliberate motion to avoid jarring the mechanism․ You may feel a slight resistance as the transfer case shifts․ Once the lever is securely in the 2H position‚ release it and allow the system to fully engage․
Manually Shifting an Electronic Transfer Case to 2WD (Troubleshooting)
If your electronic transfer case fails‚ shift manually․ This involves removing the shift motor and using a wrench․ Full clockwise is often 2WD․ Identify the position to ensure proper 2WD engagement․
Removing the Shift Motor
To manually shift an electronic transfer case‚ start by safely securing your vehicle and locating the shift motor on the transfer case․ Disconnect the electrical connector from the shift motor‚ taking care not to damage the wiring or connector itself․ Next‚ unbolt the shift motor from the transfer case․ The number of bolts may vary depending on your vehicle’s make and model‚ so consult your service manual for specific instructions․
Once the bolts are removed‚ carefully detach the shift motor from the transfer case․ You may need to gently wiggle it to loosen it from any seals or gaskets․ Be mindful of the spline shaft that connects the motor to the transfer case internals․ With the shift motor removed‚ you’ll have access to the spline shaft‚ allowing you to manually shift the transfer case․ Store the shift motor in a safe place for potential future repairs or diagnostics․
Using a Wrench to Manually Shift
After removing the shift motor‚ you can manually shift the transfer case using a wrench․ Identify the spline shaft where the shift motor was connected․ Select a wrench that fits the spline shaft’s nut or exposed shaft end․ A 9/16″ wrench is sometimes appropriate‚ but confirm the correct size for your vehicle․
Carefully position the wrench on the spline shaft․ Gently turn the shaft․ Note the detent positions‚ which represent different transfer case modes (2WD‚ 4H‚ N‚ 4L)․ Full clockwise is often 2WD․ If all positions turn the front driveshaft‚ the case may be misaligned․ Ensure the assembled case aligns with the encoder motor’s position before proceeding․ Shift firmly but avoid excessive force․ If shifting is difficult‚ check for obstructions․
Identifying 2WD Position on the Spline Shaft
After removing the shift motor and preparing to manually shift‚ correctly identifying the 2WD position on the spline shaft is crucial․ The 2WD position disengages the front axle from the powertrain‚ allowing power solely to the rear wheels․ A common configuration sets the 2WD position at the full clockwise rotation of the spline shaft․
However‚ confirm this with your vehicle’s specific documentation or diagrams․ Some transfer cases may differ․ Gently rotate the spline shaft using a wrench or appropriate tool․ As you rotate‚ observe any movement in the front driveshaft․ In the 2WD position‚ the front driveshaft should not engage․ If all positions seem to engage the front driveshaft‚ ensure no misalignment exists between the case and encoder motor․
Check the linkage to make sure it’s still attached․ Check the linkage to make sure it is still moving․ Sometimes linkage issues can be the sole cause of shifting issues․
Linkage Problems
Linkage problems are a common issue when attempting to manually shift a transfer case․ The linkage connects the shift lever inside the vehicle to the transfer case itself․ Over time‚ this linkage can become loose‚ bent‚ or corroded‚ preventing smooth and accurate shifting․
If you’re experiencing difficulty shifting‚ the first step is to inspect the linkage for any visible signs of damage․ Look for loose connections‚ excessive rust‚ or any obstructions that may be hindering its movement․ Sometimes‚ simply tightening the bolts or lubricating the linkage can resolve the issue․
In more severe cases‚ the linkage may need to be replaced entirely․ Replacement kits are available for many vehicles and can be installed with basic mechanical skills․ If you’re unsure how to proceed‚ consulting a mechanic is always a good idea․ Ignoring linkage problems can lead to further damage to the transfer case and potentially leave you stranded․
Vacuum System Failure (if applicable)
Vacuum system failures can prevent proper transfer case operation in some older 4×4 vehicles․ These systems use engine vacuum to engage or disengage the front axle․ A leak or malfunction in the vacuum lines‚ actuators‚ or vacuum switch can prevent the system from functioning correctly‚ potentially leaving you stuck in 4WD or unable to engage it․
Diagnosing a vacuum system issue often involves checking the vacuum lines for cracks‚ leaks‚ or disconnections․ A vacuum gauge can be used to verify that the system is producing adequate vacuum․ Actuators can be tested to ensure they are holding vacuum and moving freely․
If a vacuum leak is found‚ replacing the damaged lines or components is necessary․ In some cases‚ a faulty vacuum switch may need to be replaced․ While some repairs can be done at home‚ a mechanic is often needed․
Common Issues and Considerations
Importance of Owner’s Manual
Your vehicle’s owner’s manual is an invaluable resource for understanding its specific transfer case system․ It provides detailed information on operation‚ maintenance‚ and troubleshooting․ The manual contains specific instructions for shifting between 2WD and 4WD modes‚ including any specific procedures for your vehicle model․
The owner’s manual also identifies the type of transfer case your vehicle has‚ whether it’s a manual shift‚ electronic shift‚ or automatic system․ Knowing your transfer case type is crucial for performing the correct manual shifting procedures․ The manual also highlights recommended maintenance schedules for the transfer case‚ such as fluid changes․
Furthermore‚ the owner’s manual often includes diagrams and illustrations that can aid in locating the transfer case‚ shift lever‚ or other related components․ Ignoring the owner’s manual can lead to improper operation․