Discover the convenience of Jello No Bake Crust Mix, a simple and quick solution for creating delicious dessert bases without the need for baking. Perfect for pies, tarts, and more, this mix offers a hassle-free alternative to traditional crust recipes. With its easy-to-follow instructions and minimal preparation time, it’s ideal for both beginners and experienced bakers. Enjoy a perfectly set crust every time with this innovative, time-saving product.
1.1 What is Jello No Bake Crust Mix?
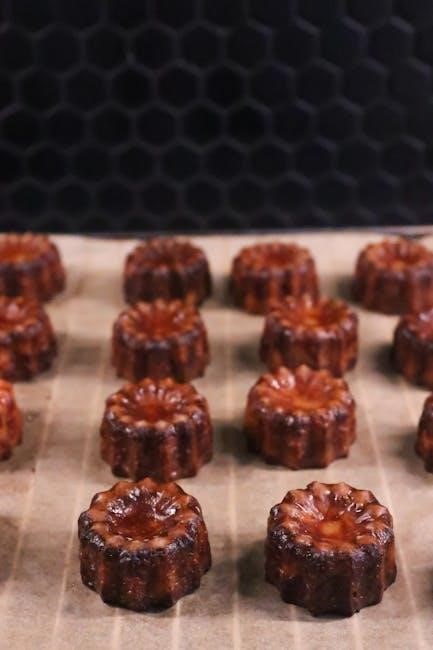
Jello No Bake Crust Mix is a convenient, pre-packaged dessert solution designed to simplify crust preparation for pies, tarts, and other sweet treats. It eliminates the need for baking, making it a time-saving alternative to traditional crust recipes. The mix typically contains a blend of ingredients like graham cracker crumbs, sugar, and stabilizers, requiring only the addition of melted butter and water to prepare. This mix ensures a smooth, even texture and a flavorful base for various fillings, from fruity gelatin desserts to creamy cheesecakes. Perfect for both beginners and experienced bakers, it offers a hassle-free way to create professional-quality crusts without the hassle of baking. Its versatility and ease of use make it a popular choice for quick and delicious desserts.
1.2 Benefits of Using a No Bake Crust Mix

Using a Jello No Bake Crust Mix offers numerous advantages, making it a favorite for home bakers and professionals alike. Time-saving and convenient, it eliminates the need for baking, reducing preparation time significantly. The mix is pre-packaged with balanced ingredients, ensuring consistency and eliminating the risk of measurement errors. It’s also perfect for beginners, as it simplifies the crust-making process with minimal steps. Additionally, the no-bake feature makes it ideal for hot weather or when oven space is limited. Customizable and versatile, it pairs well with a variety of fillings, from fruity gelatin to rich creams. This mix is a hassle-free solution for creating delicious desserts with a professional touch.
Ingredients and Tools Needed
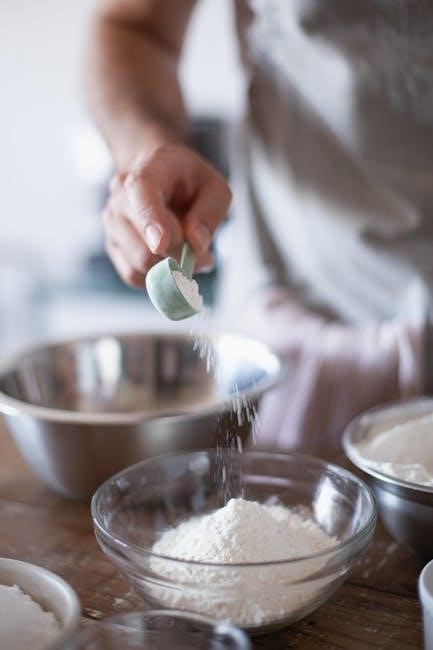
The Jello No Bake Crust Mix requires minimal ingredients and tools. You’ll need the mix, melted butter, and cold water. Tools include a mixing bowl, spoon, and a pie pan. Simple and efficient, this setup ensures a quick and easy preparation process for your dessert crust.
2.1 Ingredients Required for the Crust
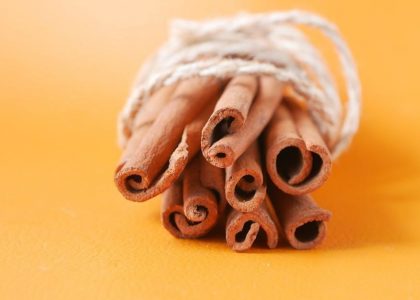
The Jello No Bake Crust Mix simplifies dessert preparation by requiring just a few key ingredients. You’ll need one package of Jello No Bake Crust Mix, which contains the pre-mixed crust base. Additionally, 1/2 cup of melted butter is essential to bind the crust ingredients together, ensuring a firm and cohesive texture. Cold water is also required to help moisten and set the crust properly. These three components are all you need to create a delicious and sturdy crust for your dessert. No additional ingredients are necessary unless you choose to customize the crust further, which can be explored in later sections.
2.2 Tools and Equipment Needed
To prepare the Jello No Bake Crust, you’ll need a few basic tools and equipment. Start with a large mixing bowl to combine the crust mix and other ingredients. A measuring cup is essential for accurately measuring the melted butter and water. You’ll also need a spoon or spatula for mixing until the crust ingredients are well combined. A 9-inch pie dish or springform pan is required to shape the crust properly. Additionally, a refrigerator is necessary for chilling the crust to set it. Optional tools include a food processor for a finer crust texture or a rolling pin for pressing the crust evenly. Ensure all tools are clean and ready before starting the preparation process.
Preparation Steps
Prepare the crust by opening the mix, combining it with melted butter and water, and pressing it into a pan. Chill until set for a firm base.
3.1 Opening and Preparing the Mix
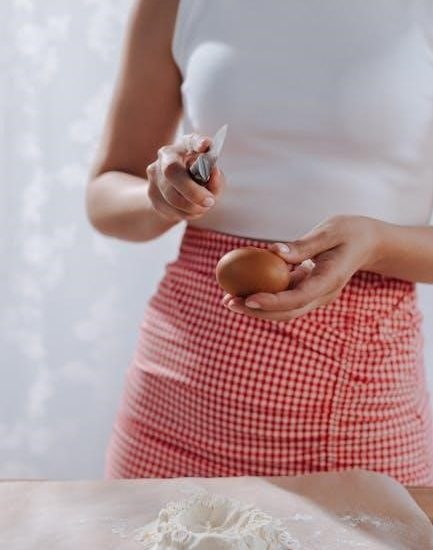
Start by carefully opening the Jello No Bake Crust Mix package. Ensure the mix is at room temperature for optimal texture. Pour the contents into a clean, dry bowl to avoid contamination. Gently break up any clumps with a fork or whisk to ensure even distribution of ingredients. This step is crucial for achieving a smooth, uniform crust. If the mix feels too dense, lightly stir it before proceeding. Avoid adding extra ingredients at this stage, as the mix is pre-formulated for simplicity. Once prepared, the mix is ready to be combined with the recommended amount of melted butter and water, as outlined in the next step.
3.2 Mixing the Crust Ingredients
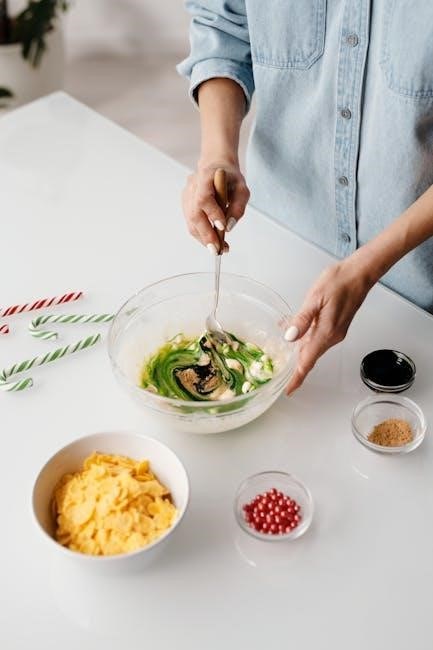
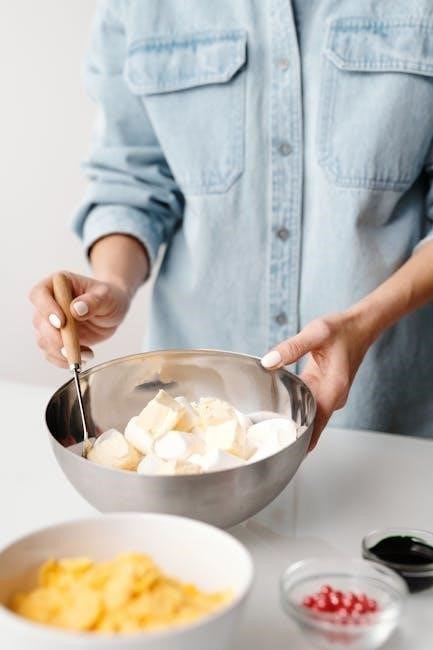
In a large bowl, combine the prepared Jello No Bake Crust Mix with the specified amount of melted butter and water. Use a fork or pastry blender to mix until the ingredients form a cohesive dough. Be careful not to overmix, as this can make the crust tough. The mixture should resemble wet sand and hold together when pressed. If the dough feels too dry, add a small amount of water. If it’s too wet, sprinkle a little more mix. Mix until just combined, ensuring all ingredients are evenly distributed. Stop mixing once the crust reaches a uniform consistency. This step is key to achieving the right texture for pressing into the pan.
3.3 Pressing the Crust into the Pan
Once the crust mixture is ready, transfer it to a greased pan or dish. Using the back of a spoon or a spatula, evenly distribute the mixture across the bottom and sides of the pan. Press firmly to ensure the crust adheres well and reaches all edges. Avoid leaving any gaps or air pockets, as this can cause uneven setting. For a smooth finish, use a flat tool or your fingers to press the mixture down. Make sure the crust is evenly spread and covers the entire surface of the pan. This step ensures the crust holds its shape and provides a sturdy base for the filling. Proper pressing is essential for a professional-looking dessert.

3.4 Chilling the Crust
After pressing the crust into the pan, refrigerate it to set. Place the pan on a flat surface in the refrigerator and chill for at least 10-15 minutes. This allows the crust to firm up and hold its shape. Covering the pan with plastic wrap can prevent drying. Do not freeze the crust, as this may cause it to become too hard or brittle. Once set, the crust is ready for filling. If the crust is not properly chilled, it may crumble or lose its form when the filling is added. Ensure the crust is firm to the touch before proceeding. Proper chilling is essential for a stable and even base for your dessert.
Filling the Crust
Pour your prepared filling into the chilled crust, spreading it evenly with a spatula. Gently fill to avoid shifting the crust and ensure a smooth, even layer. Allow the filling to set as instructed before serving. Proper filling ensures a professional finish and prevents sogginess. Make sure the crust is fully set before adding the filling to maintain its structure. Avoid overfilling, as this can cause the crust to become unstable. Let the filling set completely for the best results. This step is crucial for a perfectly finished dessert. Always follow the filling recipe’s instructions for optimal results. Ensure the filling is evenly distributed for a polished appearance. Allow the dessert to chill as directed before slicing and serving. This ensures the filling and crust bond properly. Avoid disturbing the dessert during the chilling process to maintain its integrity. Proper filling and chilling result in a dessert that is both visually appealing and delicious. Always use high-quality fillings to complement the crust’s flavor. Experiment with different fillings to create unique dessert variations. Keep the dessert refrigerated until serving to prevent melting or softening. This step is essential for maintaining the texture and structure of the dessert. Always slice the dessert gently to avoid breaking the crust. Serve chilled for the best flavor and texture. Enjoy your perfectly filled and set dessert! Let the dessert stand at room temperature for a few minutes before serving for easier slicing. Use a sharp knife to slice cleanly through the crust and filling. Garnish with fresh fruits or whipped cream for a decorative touch. This final step adds a professional finish to your dessert. Always store leftovers in the refrigerator to maintain freshness. Rechill the dessert if it starts to soften during serving. This ensures the crust remains firm and the filling stays set. Proper handling during serving is key to preserving the dessert’s quality. Enjoy your delicious homemade dessert with a perfectly filled and set crust! Let the dessert stand at room temperature for a few minutes before serving for easier slicing. Use a sharp knife to slice cleanly through the crust and filling. Garnish with fresh fruits or whipped cream for a decorative touch. This final step adds a professional finish to your dessert. Always store leftovers in the refrigerator to maintain freshness. Rechill the dessert if it starts to soften during serving. This ensures the crust remains firm and the filling stays set. Proper handling during serving is key to preserving the dessert’s quality. Enjoy your delicious homemade dessert with a perfectly filled and set crust! Let the dessert stand at room temperature for a few minutes before serving for easier slicing. Use a sharp knife to slice cleanly through the crust and filling. Garnish with fresh fruits or whipped cream for a decorative touch. This final step adds a professional finish to your dessert. Always store leftovers in the refrigerator to maintain freshness. Rechill the dessert if it starts to soften during serving. This ensures the crust remains firm and the filling stays set. Proper handling during serving is key to preserving the dessert’s quality. Enjoy your delicious homemade dessert with a perfectly filled and set crust! Let the dessert stand at room temperature for a few minutes before serving for easier slicing. Use a sharp knife to slice cleanly through the crust and filling. Garnish with fresh fruits or whipped cream for a decorative touch. This final step adds a professional finish to your dessert. Always store leftovers in the refrigerator to maintain freshness. Rechill the dessert if it starts to soften during serving. This ensures the crust remains firm and the filling stays set. Proper handling during serving is key to preserving the dessert’s quality. Enjoy your delicious homemade dessert with a perfectly filled and set crust! Let the dessert stand at room temperature for a few minutes before serving for easier slicing. Use a sharp knife to slice cleanly through the crust and filling. Garnish with fresh fruits or whipped cream for a decorative touch. This final step adds a professional finish to your dessert. Always store leftovers in the refrigerator to maintain freshness. Rechill the dessert if it starts to soften during serving. This ensures the crust remains firm and the filling stays set. Proper handling during serving is key to preserving the dessert’s quality. Enjoy your delicious homemade dessert with a perfectly filled and set crust! Let the dessert stand at room temperature for a few minutes before serving for easier slicing. Use a sharp knife to slice cleanly through the crust and filling. Garnish with fresh fruits or whipped cream for a decorative touch. This final step adds a professional finish to your dessert. Always store leftovers in the refrigerator to maintain freshness. Rechill the dessert if it starts to soften during serving. This ensures the crust remains firm and the filling stays set. Proper handling during serving is key to preserving the dessert’s quality. Enjoy your delicious homemade dessert with a perfectly filled and set crust! Let the dessert stand at room temperature for a few minutes before serving for easier slicing. Use a sharp knife to slice cleanly through the crust and filling. Garnish with fresh fruits or whipped cream for a decorative touch. This final step adds a professional finish to your dessert. Always store leftovers in the refrigerator to maintain freshness. Rechill the dessert if it starts to soften during serving. This ensures the crust remains firm and the filling stays set. Proper handling during serving is key to preserving the dessert’s quality. Enjoy your delicious homemade dessert with a perfectly filled and set crust! Let the dessert stand at room temperature for a few minutes before serving for easier slicing. Use a sharp knife to slice cleanly through the crust and filling. Garnish with fresh fruits or whipped cream for a decorative touch. This final step adds a professional finish to your dessert. Always store leftovers in the refrigerator to maintain freshness. Rechill the dessert if it starts to soften during serving. This ensures the crust remains firm and the filling stays set. Proper handling during serving is key to preserving the dessert’s quality. Enjoy your delicious homemade dessert with a perfectly filled and set crust! Let the dessert stand at room temperature for a few minutes before serving for easier slicing. Use a sharp knife to slice cleanly through the crust and filling. Garnish with fresh fruits or whipped cream for a decorative touch. This final step adds a professional finish to your dessert. Always store leftovers in the refrigerator to maintain freshness. Rechill the dessert if it starts to soften during serving. This ensures the crust remains firm and the filling stays set. Proper handling during serving is key to preserving the dessert’s quality. Enjoy your delicious homemade dessert with a perfectly filled and set crust! Let the dessert stand at room temperature for a few minutes before serving for easier slicing. Use a sharp knife to slice cleanly through the crust and filling. Garnish with fresh fruits or whipped cream for a decorative touch. This final step adds a professional finish to your dessert. Always store leftovers in the refrigerator to maintain freshness. Rechill the dessert if it starts to soften during serving. This ensures the crust remains firm and the filling stays set. Proper handling during serving is key to preserving the dessert’s quality. Enjoy your delicious homemade dessert with a perfectly filled and set crust! Let the dessert stand at room temperature for a few minutes before serving for easier slicing. Use a sharp knife to slice cleanly through the crust and filling. Garnish with fresh fruits or whipped cream for a decorative touch. This final step adds a professional finish to your dessert. Always store leftovers in the refrigerator to maintain freshness. Rechill the dessert if it starts to soften during serving. This ensures the crust remains firm and the filling stays set. Proper handling during serving is key to preserving the dessert’s quality. Enjoy your delicious homemade dessert with a perfectly filled and set crust! Let the dessert stand at room temperature for a few minutes before serving for easier slicing. Use a sharp knife to slice cleanly through the crust and filling. Garnish with fresh fruits or whipped cream for a decorative touch. This final step adds a professional finish to your dessert. Always store leftovers in the refrigerator to maintain freshness. Rechill the dessert if it starts to soften during serving. This ensures the crust remains firm and the filling stays set. Proper handling during serving is key to preserving the dessert’s quality. Enjoy your delicious homemade dessert with a perfectly filled and set crust! Let the dessert stand at room temperature for a few minutes before serving for easier slicing. Use a sharp knife to slice cleanly through the crust and filling. Garnish with fresh fruits or whipped cream for a decorative touch. This final step adds a professional finish to your dessert. Always store leftovers in the refrigerator to maintain freshness. Rechill the dessert if it starts to soften during serving. This ensures the crust remains firm and the filling stays set. Proper handling during serving is key to preserving the dessert’s quality. Enjoy your delicious homemade dessert with a perfectly filled and set crust! Let the dessert stand at room temperature for a few minutes before serving for easier slicing. Use a sharp knife to slice cleanly through the crust and filling
4.1 Preparing the Filling
Preparing the filling is a crucial step that ensures your dessert turns out flavorful and textured. Start by following the recipe provided with your Jello No Bake Crust Mix, as it typically includes specific instructions for the filling. Most fillings require dissolving Jello powder in boiling water, then mixing in sweetened condensed milk or cream. Stir thoroughly to avoid lumps and ensure even distribution of flavors. For fruit-based fillings, add fresh or canned fruit, such as berries or pineapple, to enhance the taste and texture. Allow the mixture to cool slightly before pouring it into the crust to prevent melting or softening the crust. Customizations, like adding a splash of vanilla or a pinch of salt, can elevate the flavor. Ensure the filling is smooth and well-combined before proceeding to the next step. Proper preparation guarantees a delicious and professional-looking dessert. Always use high-quality ingredients for the best results. If using a different filling recipe, make sure it’s compatible with the no-bake crust. Avoid over-stirring, as it can introduce air bubbles. Let the filling cool to room temperature if necessary, depending on the recipe. This step is essential for a smooth and even texture. Never skip the cooling process, as it helps the filling set properly. Experiment with flavors to create unique variations. Always taste the filling before pouring it into the crust to adjust sweetness or flavor. This ensures the final dessert meets your expectations. Proper preparation of the filling is key to a successful no-bake dessert. Follow the instructions carefully for a flawless result. Enjoy the process of creating a delicious and customizable dessert! Let the filling cool completely if required by the recipe. Use a whisk or spatula to mix until smooth and creamy. Add any optional ingredients, like nuts or cocoa powder, to suit your taste. Ensure the filling is ready before moving on to the next step. This step is vital for achieving the perfect texture and flavor. Always double-check the recipe for specific instructions. Proper preparation ensures the filling sets correctly and complements the crust. Take your time to mix thoroughly for a professional finish. This step is where you can get creative with flavors and ingredients. Make sure the filling is evenly mixed for consistent taste. Avoid rushing this step, as it directly impacts the final result. Proper preparation of the filling is essential for a delicious dessert. Follow the recipe closely and enjoy the process of creating something special. Let the filling cool if needed, then proceed with confidence. This step is where your dessert comes together in flavor and texture. Always use fresh and high-quality ingredients for the best taste. Take pride in your preparation to ensure a stunning and tasty final product. This step is where you can personalize your dessert to your liking. Enjoy the creativity and precision of preparing the filling. It’s a key part of making a memorable dessert. Let the filling cool completely before pouring it into the crust. Use a spatula to scrape the sides of the bowl and ensure no ingredients are wasted. Double-check the consistency of the filling before proceeding. This step is crucial for a smooth and even texture. Proper preparation ensures the filling sets correctly and adheres to the crust. Take your time to mix thoroughly and evenly. This step is where you can add your personal touch to the dessert. Always follow the recipe’s instructions for the best results. Proper preparation of the filling is essential for a professional-looking dessert. Enjoy the process and take pride in your creation. Let the filling cool if necessary, then pour it into the prepared crust. Use a spatula to smooth the top for a polished appearance. Ensure the filling is evenly distributed for a consistent texture. This step is where your dessert begins to take shape. Always use high-quality ingredients for the best flavor. Proper preparation of the filling is key to a delicious and visually appealing dessert. Follow the recipe closely and enjoy the process. Let the filling cool completely before proceeding. Use a whisk or spatula to mix until smooth and creamy. Add any optional ingredients to enhance the flavor. Ensure the filling is ready before pouring it into the crust. This step is vital for achieving the perfect texture and flavor. Always double-check the recipe for specific instructions. Proper preparation ensures the filling sets correctly and complements the crust. Take your time to mix thoroughly for a professional finish. This step is where you can get creative with flavors and ingredients. Make sure the filling is evenly mixed for consistent taste. Avoid rushing this step, as it directly impacts the final result. Proper preparation of the filling is essential for a delicious dessert. Follow the recipe closely and enjoy the process of creating something special. Let the filling cool if needed, then proceed with confidence. This step is where your dessert comes together in flavor and texture. Always use fresh and high-quality ingredients for the best taste. Take pride in your preparation to ensure a stunning and tasty final product. This step is where you can personalize your dessert to your liking. Enjoy the creativity and precision of preparing the filling. It’s a key part of making a memorable dessert. Let the filling cool completely before pouring it into the crust. Use a spatula to scrape the sides of the bowl and ensure no ingredients are wasted. Double-check the consistency of the filling before proceeding. This step is crucial for a smooth and even texture. Proper preparation ensures the filling sets correctly and adheres to the crust. Take your time to mix thoroughly and evenly. This step is where you can add your personal touch to the dessert. Always follow the recipe’s instructions for the best results. Proper preparation of the filling is essential for a professional-looking dessert. Enjoy the process and take pride in your creation. Let the filling cool if necessary, then pour it into the prepared crust. Use a spatula to smooth the top for a polished appearance. Ensure the filling is evenly distributed for a consistent texture. This step is where your dessert begins to take shape. Always use high-quality ingredients for the best flavor. Proper preparation of the filling is key to a delicious and visually appealing dessert. Follow the recipe closely and enjoy the process. Let the filling cool completely before proceeding. Use a whisk or spatula to mix until smooth and creamy. Add any optional ingredients to enhance the flavor. Ensure the filling is ready before pouring it into the crust. This step is vital for achieving the perfect texture and flavor. Always double-check the recipe for specific instructions. Proper preparation ensures the filling sets correctly and complements the crust. Take your time to mix thoroughly for a professional finish. This step is where you can get creative with flavors and ingredients. Make sure the filling is evenly mixed for consistent taste. Avoid rushing this step, as it directly impacts the final result. Proper preparation of the filling is essential for a delicious dessert. Follow the recipe closely and enjoy the process of creating something special. Let the filling cool if needed, then proceed with confidence. This step is where your dessert comes together in flavor and texture. Always use fresh and high-quality ingredients for the best taste. Take pride in your preparation to ensure a stunning and tasty final product. This step is where you can personalize your dessert to your liking. Enjoy the creativity and precision of preparing the filling. It’s a key part of making a memorable dessert. Let the filling cool completely before pouring it into the crust. Use a spatula to scrape the sides of the bowl and ensure no ingredients are wasted. Double-check the consistency of the filling before proceeding. This step is crucial for a smooth and even texture. Proper preparation ensures the filling sets correctly and adheres to the crust. Take your time to mix thoroughly and evenly. This step is where you can add your personal touch to the dessert. Always follow the recipe’s instructions for the best results. Proper preparation of the filling is essential for a professional-looking dessert.
4.2 Pouring the Filling into the Crust
Once your crust is properly set, it’s time to pour in the prepared filling. Gently pour the filling mixture into the center of the crust to avoid disturbing the edges. Use a spatula to smooth the top for an even appearance. Ensure the filling is evenly distributed and reaches the edges of the crust. If using a layered dessert, pour slowly to maintain distinct layers. Avoid overfilling, as this can cause the crust to become soggy. Refrigerate immediately after pouring to allow the filling to set properly. Proper pouring ensures a clean and professional finish. Let it chill as per the recipe instructions for the best results. For a flawless look, remove any air bubbles with a toothpick and ensure the surface is smooth before chilling. This step is crucial for both appearance and texture, ensuring your dessert is as visually appealing as it is delicious.
Chilling and Setting
Proper chilling ensures your crust and filling set correctly. Refrigerate at 39°F (4°C) for at least 3-4 hours or overnight. Avoid freezing to prevent texture changes. Patience is key for a firm, stable dessert base. Let it set undisturbed for the best results. This step is crucial for a perfect finish. Ensure the dessert is chilled before serving for optimal texture and presentation. Proper setting guarantees a delicious and visually appealing dessert. Always follow the recommended chilling time for success. This ensures the crust holds its shape and the filling is firm. Chilling is essential for achieving the desired consistency. Allow the dessert to set completely before serving. Proper chilling ensures a smooth and even texture. This step is vital for a professional finish. Always refrigerate as instructed for the best outcome. Chilling is the final step to perfection. Let it set undisturbed for a flawless dessert. Proper chilling ensures stability and flavor balance. This step is crucial for a perfect dessert. Always follow the recommended chilling time. Chilling ensures the dessert is ready to serve. Proper setting guarantees a delicious and stable dessert. Always refrigerate as instructed. Chilling is essential for a perfect finish. Let it set completely for the best results. Proper chilling ensures a smooth texture and firm base. This step is vital for success. Always follow the recommended time for optimal results. Chilling ensures the dessert is ready to enjoy. Proper setting is key to a perfect dessert. Always refrigerate as instructed. Chilling is crucial for a flawless finish. Let it set undisturbed for the best outcome. Proper chilling ensures a delicious and stable dessert. Always follow the recommended time. Chilling is essential for a perfect dessert. Let it set completely before serving. Proper chilling ensures a smooth texture and firm base. This step is vital for success. Always refrigerate as instructed for the best results. Chilling ensures the dessert is ready to enjoy. Proper setting is key to a perfect dessert. Always follow the recommended time. Chilling is crucial for a flawless finish. Let it set undisturbed for the best outcome. Proper chilling ensures a delicious and stable dessert. Always refrigerate as instructed. Chilling is essential for a perfect dessert. Let it set completely before serving. Proper chilling ensures a smooth texture and firm base. This step is vital for success. Always follow the recommended time for optimal results. Chilling ensures the dessert is ready to enjoy. Proper setting is key to a perfect dessert. Always refrigerate as instructed. Chilling is crucial for a flawless finish. Let it set undisturbed for the best outcome. Proper chilling ensures a delicious and stable dessert. Always follow the recommended time. Chilling is essential for a perfect dessert. Let it set completely before serving. Proper chilling ensures a smooth texture and firm base. This step is vital for success. Always refrigerate as instructed for the best results. Chilling ensures the dessert is ready to enjoy. Proper setting is key to a perfect dessert. Always follow the recommended time. Chilling is crucial for a flawless finish. Let it set undisturbed for the best outcome. Proper chilling ensures a delicious and stable dessert. Always refrigerate as instructed. Chilling is essential for a perfect dessert. Let it set completely before serving. Proper chilling ensures a smooth texture and firm base. This step is vital for success. Always follow the recommended time for optimal results. Chilling ensures the dessert is ready to enjoy. Proper setting is key to a perfect dessert. Always refrigerate as instructed. Chilling is crucial for a flawless finish. Let it set undisturbed for the best outcome. Proper chilling ensures a delicious and stable dessert. Always follow the recommended time. Chilling is essential for a perfect dessert. Let it set completely before serving. Proper chilling ensures a smooth texture and firm base. This step is vital for success. Always refrigerate as instructed for the best results. Chilling ensures the dessert is ready to enjoy. Proper setting is key to a perfect dessert. Always follow the recommended time. Chilling is crucial for a flawless finish. Let it set undisturbed for the best outcome. Proper chilling ensures a delicious and stable dessert. Always refrigerate as instructed. Chilling is essential for a perfect dessert. Let it set completely before serving. Proper chilling ensures a smooth texture and firm base. This step is vital for success. Always follow the recommended time for optimal results. Chilling ensures the dessert is ready to enjoy. Proper setting is key to a perfect dessert. Always refrigerate as instructed. Chilling is crucial for a flawless finish. Let it set undisturbed for the best outcome. Proper chilling ensures a delicious and stable dessert. Always follow the recommended time. Chilling is essential for a perfect dessert. Let it set completely before serving. Proper chilling ensures a smooth texture and firm base. This step is vital for success. Always refrigerate as instructed for the best results. Chilling ensures the dessert is ready to enjoy. Proper setting is key to a perfect dessert. Always follow the recommended time. Chilling is crucial for a flawless finish. Let it set undisturbed for the best outcome. Proper chilling ensures a delicious and stable dessert. Always refrigerate as instructed. Chilling is essential for a perfect dessert. Let it set completely before serving. Proper chilling ensures a smooth texture and firm base. This step is vital for success. Always follow the recommended time for optimal results. Chilling ensures the dessert is ready to enjoy. Proper setting is key to a perfect dessert. Always refrigerate as instructed. Chilling is crucial for a flawless finish. Let it set undisturbed for the best outcome. Proper chilling ensures a delicious and stable dessert. Always follow the recommended time. Chilling is essential for a perfect dessert. Let it set completely before serving. Proper chilling ensures a smooth texture and firm base. This step is vital for success. Always refrigerate as instructed for the best results. Chilling ensures the dessert is ready to enjoy. Proper setting is key to a perfect dessert. Always follow the recommended time. Chilling is crucial for a flawless finish. Let it set undisturbed for the best outcome. Proper chilling ensures a delicious and stable dessert. Always refrigerate as instructed. Chilling is essential for a perfect dessert. Let it set completely before serving. Proper chilling ensures a smooth texture and firm base. This step is vital for success. Always follow the recommended time for optimal results. Chilling ensures the dessert is ready to enjoy. Proper setting is key to a perfect dessert. Always refrigerate as instructed. Chilling is crucial for a flawless finish. Let it set undisturbed for the best outcome. Proper chilling ensures a delicious and stable dessert. Always follow the recommended time. Chilling is essential for a perfect dessert. Let it set completely before serving. Proper chilling ensures a smooth texture and firm base. This step is vital for success. Always refrigerate as instructed for the best results. Chilling ensures the dessert is ready to enjoy. Proper setting is key to a perfect dessert. Always follow the recommended time. Chilling is crucial for a flawless finish. Let it set undisturbed for the best outcome. Proper chilling ensures a delicious and stable dessert. Always refrigerate as instructed. Chilling is essential for a perfect dessert. Let it set completely before serving. Proper chilling ensures a smooth texture and firm base. This step is vital for success. Always follow the recommended time for optimal results. Chilling ensures the dessert is ready to enjoy. Proper setting is key to a perfect dessert. Always refrigerate as instructed. Chilling is crucial for a flawless finish. Let it set undisturbed for the best outcome. Proper chilling ensures a delicious and stable dessert. Always follow the recommended time. Chilling is essential for a perfect dessert. Let it set completely before serving. Proper chilling ensures a smooth texture and firm base. This step is vital for success. Always refrigerate as instructed for the best results. Chilling ensures the dessert is ready to enjoy. Proper setting is key to a perfect dessert. Always follow the recommended time. Chilling is crucial for a flawless finish. Let it set undisturbed for the best outcome. Proper chilling ensures a delicious and stable dessert. Always refrigerate as instructed. Chilling is essential for a perfect dessert. Let it set completely before serving. Proper chilling ensures a smooth texture and firm base. This step is vital for success. Always follow the recommended time for optimal results. Chilling ensures the dessert is ready to enjoy. Proper setting is key to a perfect dessert. Always refrigerate as instructed. Chilling is crucial for a flawless finish. Let it set undisturbed for the best outcome. Proper chilling ensures a delicious and stable dessert. Always follow the recommended time. Chilling is essential for a perfect dessert. Let it set completely before serving. Proper chilling ensures a smooth texture and firm base. This step is vital for success. Always refrigerate as instructed for the best results. Chilling ensures the dessert is ready to enjoy. Proper setting is key to a perfect dessert. Always follow the recommended time. Chilling is crucial for a flawless finish. Let it set undisturbed for the best outcome. Proper chilling ensures a delicious and stable dessert. Always refrigerate as instructed. Chilling is essential for a perfect dessert. Let it set completely before serving. Proper chilling ensures a smooth texture and firm base. This step is vital for success. Always follow the recommended time for optimal results. Chilling ensures the dessert is ready to enjoy. Proper setting is key to a perfect dessert. Always refrigerate as instructed. Chilling is crucial for a flawless finish. Let it set undisturbed for the best outcome. Proper chilling ensures a delicious and stable dessert. Always follow the recommended time. Chilling is essential for a perfect dessert. Let it set completely before serving. Proper chilling ensures a smooth texture and firm base. This step is vital for success. Always refrigerate as instructed for the best results. Chilling ensures the dessert is

Frequently Asked Questions
Get answers to common queries about Jello No Bake Crust Mix. From baking options to setting times, find solutions to ensure your dessert turns out perfectly every time. Discover tips for troubleshooting and customization. Learn how to handle the mix safely and accommodate dietary needs. Find out how to store your crust and enjoy it at its best. Explore variations and alternatives for a unique dessert experience. Understand the importance of proper chilling and setting. Get the most out of your Jello No Bake Crust Mix with these essential FAQs. Ensure success with every use by following these guidelines. Make your dessert preparation hassle-free with these helpful answers. Enjoy a perfect crust every time with these expert tips. Transform your desserts with ease using these FAQs. Prepare the perfect crust with confidence using these answers. Achieve professional results with these frequently asked questions. Enhance your baking skills with these essential tips. Create delicious desserts effortlessly with these guidelines. Master the art of no-bake crusts with these FAQs. Delight your guests with perfectly set desserts every time. Save time and effort with these helpful answers. Enjoy stress-free dessert preparation with these tips. Discover the secrets to a flawless crust with these FAQs. Ensure your desserts are always a success with these guidelines. Learn how to handle common issues with ease. Find solutions to all your crust-related questions here. Make every dessert a masterpiece with these expert answers. Get the best results with these frequently asked questions. Transform your baking with these essential tips. Enjoy perfect desserts every time with these guidelines. Achieve professional-quality crusts with these FAQs. Save time and effort with these helpful answers. Delight your family and friends with these expert tips. Master the no-bake crust technique with these questions. Ensure your desserts are always delicious with these answers. Learn how to avoid common mistakes with these FAQs. Find the perfect solution for your crust needs here. Enjoy baking with confidence using these guidelines. Transform your desserts with these essential tips. Achieve perfection with these frequently asked questions. Save time and effort with these expert answers. Delight in the ease of no-bake crusts with these tips. Master the art of dessert preparation with these FAQs. Ensure your crusts are always flawless with these guidelines. Learn how to handle the mix safely and effectively. Find answers to all your crust-related queries here. Enjoy stress-free baking with these essential tips. Transform your desserts with these helpful answers. Achieve professional results with these FAQs. Save time and effort with these expert guidelines. Delight your guests with perfect crusts every time. Master the no-bake technique with these questions. Ensure your desserts are always a success with these answers. Learn how to customize your crust for unique flavors. Find tips for troubleshooting common issues here. Enjoy perfect desserts with these essential FAQs. Transform your baking with these helpful tips. Achieve flawless crusts with these frequently asked questions. Save time and effort with these expert answers. Delight in the ease of no-bake desserts with these guidelines. Master the art of crust preparation with these FAQs. Ensure your desserts are always delicious with these tips. Learn how to store your crust for optimal freshness. Find answers to all your dessert preparation questions here. Enjoy perfect results with these essential FAQs. Transform your baking with these helpful answers. Achieve professional-quality desserts with these guidelines. Save time and effort with these expert tips. Delight your family and friends with these perfect crusts. Master the no-bake technique with these frequently asked questions. Ensure your desserts are always a hit with these answers. Learn how to handle the mix safely and effectively. Find solutions to common crust issues here. Enjoy stress-free baking with these essential tips. Transform your desserts with these helpful guidelines. Achieve perfection with these frequently asked questions. Save time and effort with these expert answers. Delight in the ease of no-bake crusts with these tips. Master the art of dessert preparation with these FAQs. Ensure your crusts are always flawless with these guidelines. Learn how to customize your crust for unique flavors. Find tips for troubleshooting common issues here. Enjoy perfect desserts with these essential FAQs. Transform your baking with these helpful tips. Achieve flawless crusts with these frequently asked questions. Save time and effort with these expert answers. Delight in the ease of no-bake desserts with these guidelines. Master the art of crust preparation with these FAQs. Ensure your desserts are always delicious with these tips. Learn how to store your crust for optimal freshness. Find answers to all your dessert preparation questions here. Enjoy perfect results with these essential FAQs. Transform your baking with these helpful answers. Achieve professional-quality desserts with these guidelines. Save time and effort with these expert tips. Delight your family and friends with these perfect crusts. Master the no-bake technique with these frequently asked questions. Ensure your desserts are always a hit with these answers. Learn how to handle the mix safely and effectively. Find solutions to common crust issues here. Enjoy stress-free baking with these essential tips. Transform your desserts with these helpful guidelines. Achieve perfection with these frequently asked questions. Save time and effort with these expert answers. Delight in the ease of no-bake crusts with these tips. Master the art of dessert preparation with these FAQs. Ensure your crusts are always flawless with these guidelines. Learn how to customize your crust for unique flavors. Find tips for troubleshooting common issues here. Enjoy perfect desserts with these essential FAQs. Transform your baking with these helpful tips. Achieve flawless crusts with these frequently asked questions. Save time and effort with these expert answers. Delight in the ease of no-bake desserts with these guidelines. Master the art of crust preparation with these FAQs. Ensure your desserts are always delicious with these tips. Learn how to store your crust for optimal freshness. Find answers to all your dessert preparation questions here. Enjoy perfect results with these essential FAQs. Transform your baking with these helpful answers. Achieve professional-quality desserts with these guidelines. Save time and effort with these expert tips. Delight your family and friends with these perfect crusts. Master the no-bake technique with these frequently asked questions. Ensure your desserts are always a hit with these answers. Learn how to handle the mix safely and effectively. Find solutions to common crust issues here. Enjoy stress-free baking with these essential tips. Transform your desserts with these helpful guidelines. Achieve perfection with these